Friday, November 11, 2011

Install Bigbluebutton + PHP ( nginx + PHP+ red5 + freeswitch + tomcat)

Install Bigbluebutton + PHP

Install Ubuntu 10.04 server 32bit or 64bit (lucid / maverick)
Note: natty will not work

During installation select OpenSSH alone (Do not select Lamp or other server applications)
Note: I selected both LAMP and OpenSSH, later stopped apache.

After installation,

Log in as administrator

To install bigbluebutton

wget http://ubuntu.bigbluebutton.org/bigbluebutton.asc -O- | sudo apt-key add –
 
echo "deb http://ubuntu.bigbluebutton.org/lucid/ bigbluebutton-lucid main" | 
sudo tee /etc/apt/sources.list.d/bigbluebutton.list
 
echo "deb http://us.archive.ubuntu.com/ubuntu/ lucid multiverse" | sudo tee -a /etc/apt/sources.list
 
sudo apt-get install python-software-properties
 
sudo add-apt-repository ppa:freeswitch-drivers/freeswitch-nightly-drivers
 
sudo apt-get update
 
sudo apt-get install bbb-freeswitch-config
 
sudo apt-get install bigbluebutton
 
sudo bbb-conf --clean
 
sudo bbb-conf --check

Default configuration of the Nginx server at
sudo vim /etc/nginx/sites-available/bigbluebutton

Root of Nginx server at

cd /var/www/bigbluebutton-default

Install fast CGI from


PHP and nginx on Ubuntu

I've now changed my slice from running apache to nginx. Here's the simplest way, in around 6 commands, to get PHP up and running via FastCGI.

Install PHP 5:
sudo aptitude install php5-cgi
Install nginx:
sudo aptitude install nginx
Create PHP 5 FastCGI start-up script:
sudo nano /etc/init.d/php-fastcgi
Inside, put:
#!/bin/bash
BIND=127.0.0.1:9000
USER=www-data
PHP_FCGI_CHILDREN=15
PHP_FCGI_MAX_REQUESTS=1000
 
PHP_CGI=/usr/bin/php-cgi
PHP_CGI_NAME=`basename $PHP_CGI`
PHP_CGI_ARGS="- USER=$USER PATH=/usr/bin PHP_FCGI_CHILDREN=$PHP_FCGI_CHILDREN PHP_FCGI_MAX_REQUESTS=$PHP_FCGI_MAX_REQUESTS $PHP_CGI -b $BIND"
RETVAL=0

start() {
      echo -n "Starting PHP FastCGI: "
      start-stop-daemon --quiet --start --background --chuid "$USER" --exec /usr/bin/env -- $PHP_CGI_ARGS
      RETVAL=$?
      echo "$PHP_CGI_NAME."
}
stop() {
      echo -n "Stopping PHP FastCGI: "
      killall -q -w -u $USER $PHP_CGI
      RETVAL=$?
      echo "$PHP_CGI_NAME."
}
 
case "$1" in
    start)
      start
  ;;
    stop)
      stop
  ;;
    restart)
      stop
      start
  ;;
    *)
      echo "Usage: php-fastcgi {start|stop|restart}"
      exit 1
  ;;
esac
exit $RETVAL
Make start-up script executable:
sudo chmod +x /etc/init.d/php-fastcgi
Launch PHP:
sudo /etc/init.d/php-fastcgi start
Launch at start-up:
sudo update-rc.d php-fastcgi defaults
That's it. All installed and ready to go.

Test

Change server config at /etc/nginx/sites-available/bigbluebutton
location ~ \.php$ {
    fastcgi_pass    127.0.0.1:9000;
    fastcgi_index   index.php;
    fastcgi_param   SCRIPT_FILENAME /var/www/nginx-default$fastcgi_script_name;
    include         fastcgi_params;
}
Restart nginx:
sudo /etc/init.d/nginx restart
Create a file in your web root (in the example above, /var/www/bigbluebutton-default/test.php):
 
phpinfo();
Visit the page in your browser and you should see the standard PHP info page. And you're done.
Clean restart BBB
sudo bbb-conf –clean

Sunday, July 3, 2011

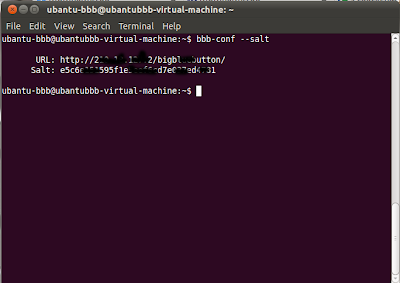
View BigBlueButton's salt

To view the bigbluebutton's salt

Install GIT for Windows 7

Git for Windows -- Download a Git repository using windows

First install MySysGit on your windows machine
Downloading and executing it will give you a working development environment and compile Git automatically!

I installed it on the C: drive(C:\msysgit) on my machine. A git comandline interface willl open up as shown below.
Navigate to the location where you want to download the repository.

Eg: I like to download the repository to E:/bbb/github/

So I used the command
cd /E/bbb/github

then give the command below to download the repository
git clone git://github.com/bbbbbbbbbbbbbbb/xyz.git

Thursday, March 31, 2011

Remove / Delete jQuery droppable item

I have a simple drag and drop feature using jQuery,
I have it so that when you add a certain class it will insert a certain input field for that class.
I cannot figure out, however, how to remove an item already dropped?
I just want a nice little x or something next to each element dropped to remove it from the drop box.

Original Script without X button.


            <script>
          $(function() {
                   $( "#catalog" ).accordion();
                   $( "#catalog li" ).draggable({
                             appendTo: "body",
                             helper: "clone"
                   });
                   $( "#cart ol" ).droppable({
                             activeClass: "ui-state-default",
                             hoverClass: "ui-state-hover",
                             accept: ":not(.ui-sortable-helper)",
                             drop: function( event, ui ) {
                                      $( this ).find( ".placeholder" ).remove();
                                      var el=$("<li>"+ui.draggable.text()+"</li>").appendTo(this);
                             }
                   });
          });
          </script>

Script with X button.
            <script>
          $(function() {
                   $( "#catalog" ).accordion();
                   $( "#catalog li" ).draggable({
                             appendTo: "body",
                             helper: "clone"
                   });
                   $( "#cart ol" ).droppable({
                             activeClass: "ui-state-default",
                             hoverClass: "ui-state-hover",
                             accept: ":not(.ui-sortable-helper)",
                             drop: function( event, ui ) {
                                      $( this ).find( ".placeholder" ).remove();
                                      var el=$("<li>"+ui.draggable.text()+"</li>&nbsp;<a href='#'>[x]</a>").filter('a').click(function(){el.remove()}).end().appendTo(this);
                             }
                   });
          });
          </script>


Reference: Experts-exchange,JqueryUI

Tuesday, March 29, 2011

[Mac OSx86] How To Change Resolution (VMware)(leopard)

Description:
How to increase the resolution of OSx86 in VMware without VMware Tools

*********
There are 2 ways you can do this.

Method 1: Temporary

    When OSX is booting, tap F8 to get to the boot prompt
    Type in "Graphics Mode"="1280x1024x32" (with quotations, replacing the resolution with the resolution you want)


Method 2: Permanent

    Boot OS X
    Open the TextEdit program in the Applications folder
    With TextEdit, open the file: /Library/Preferences/SystemConfiguration/com.apple.Boot.plist
    Open the file, and add these two lines (right after the Yes line if you are on Tiger or line if you are on Leopard)

<key>Graphics Mode</key>
<string>1280x1024x32</string>

    Replace the 1280x1024x32 with the resolution you want
    Then, in go to File >> Save As..
    Save the file as com.apple.Boot.plist on the Desktop (make sure the .plist part is there!)
    Navigate the the /Library/Preferences/SystemConfiguration/ folder
    Drag your com.apple.Boot.plist file on the Desktop into the folder window
    When a messages appears, click Authenticate and Replace and enter your password
    You're done! Reboot OS X to see the changes

Here is an example of what the com.Apple.boot.plist file looks like with Leopard:


<?xml version="1.0" encoding="UTF-8"?>
<!DOCTYPE plist PUBLIC "-//Apple Computer//DTD PLIST 1.0//EN" "http://
www.apple.com/DTDs/PropertyList-1.0.dtd">
<plist version="1.0">
<dict>
           <key>kernel</key>
           <string>mach_kernel</string>             

           <key>Kernel Flags</key>
           <string></string>
           <key>Graphics Mode</key>
           <string>1280x1024x32</string>
</dict>
</plist>


Reference: PCWIZCOMPUTER.COM


Note:


sudo -s

Try sudo -s from the Terminal. I'm 100% sure that the password is "pcwiz" in lowercase.

Saturday, March 26, 2011

Load/Save Fix for COMMANDOS: BEYOND THE CALL OF DUTY on Windows XP.

 Most of COMMANDOS fans are struggling with playing commandos(BTCOD and BEL) on Windows XP, Since they are not able to save / load the game.

Below the fix for save / load failure.

Open the directory where commandos were installed. You will see folder like
DATOS
MPLAYER

OUTPUT

README.RTF

COMANDO.REG

MSS32.DLL

MSS16.DLL

TUTORIAL.EXE

MPSERVER.EXE

SETUP.EXE

REGSETUP.EXE

WAR_MP.DIR

MSSB16.TSK

COMANDO.EXE
 

Open the folder OUTPUT,

Edit Commando.cfg


For Behind Enemy Lines add the following to Commando.cfg

Quote:


.SIZE [ .INITSIZE 3 ]
.PROFILE [ .USER 0 ]
.DEVELOP 1


For Beyond the CoD just add:
Quote:

.DEVELOP 1


This will allow you to create a profile and save games.

Wednesday, March 23, 2011

Finding out what's process is listening on a port

Monday, March 21, 2011

Monday, February 28, 2011

To build android app on Command line(Windows)

Most of the android developers used to build their android app using the IDE like netbeans or Eclipse.


This information is for the ones who want to build their android app using command line..
Install JDK,
Install Android SDK,
Install Apache Ant,


To create a new Android project, open a command-line, navigate to the tools/ directory of your SDK and run:

android create project \
--target <target_ID> \
--name <your_project_name> \
--path path/to/your/project \
--activity <your_activity_name> \
--package <your_package_namespace>


Set the path to JDK and ANT as below


set JAVA_HOME=C:\Progra~1\Java\jdk1.6.0_20
set PATH=%PATH%;S:\Progra~1\apache-ant\bin


To debug the application, 

ant debug
To build
ant release

Monday, February 7, 2011

How to set up IDE (Eclipse) for Android app development

Below is the steps to set up IDE for android app development

Download Android SDK starter package from http://developer.android.com/sdk/index.html and install.

Open Android SDK manager, install the available packages to the SDK. (I selected all the packages to install, it took around 3 hours to complete the installation)

Download Eclipse Classic 3.6.1 from http://www.eclipse.org/downloads/

Extract the package and start eclipse.exe

Start Eclipse, then select Help > Install New Software....

Click Add, in the top-right corner.

In the Add Repository dialog that appears, enter "ADT Plugin" for the Name and the following URL for the Location:

https://dl-ssl.google.com/android/eclipse/

In the Available Software dialog, select the checkbox next to Developer Tools and click Next.

In the next window, you'll see a list of the tools to be downloaded. Click Next.

Read and accept the license agreements, then click Finish.

When the installation completes, restart Eclipse.

Select Window > Preferences... to open the Preferences panel (Mac OS X: Eclipse > Preferences).

Select Android from the left panel.

For the SDK Location in the main panel, click Browse... and locate your downloaded

SDK directory.

Click Apply, and then OK.

If you are having trouble downloading the ADT plugin after following the steps above, then go to http://developer.android.com/sdk/eclipse-adt.html#installing, for manual installation steps.

“Hello world” tutorial is available here http://developer.android.com/guide/tutorials/hello-world.html